Monday, November 8, 2010

Configure OCS certificate, an error occurred while attempting to process this request

When running the "Configure Certificate" wizard in OCS 2007 setup,I came across an error, "an error occurred while attempting to process this request" at the end of the certificate request submission.


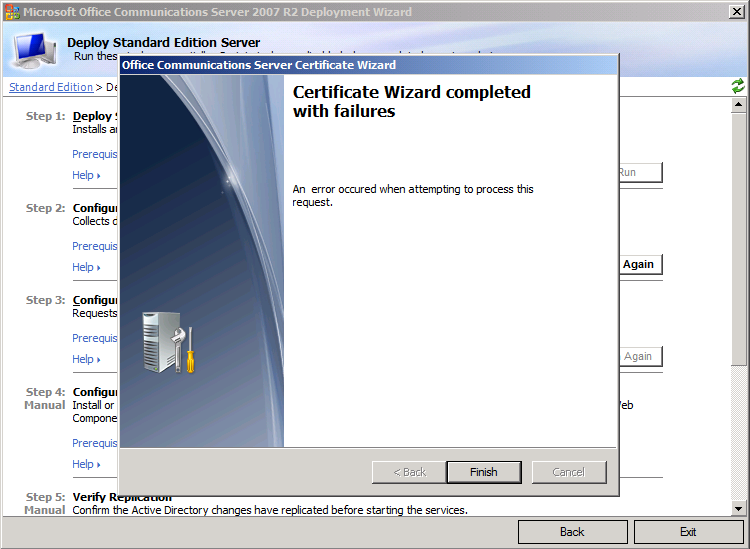
When I try to process an offline request and import the certificate, through the OCS setup wizard, I get this error "The input file is not a valid PKCS#7 file"

Reason

This is because the Trusted Root and Intermediate Certification Authorities are not imported on the system (OCS Server).

SOLUTION

The Trusted Root Certificate needs to be Exported from the CA, and imported into the OCS server.

PROCEDURE:

Export Certificate

1. Open the Certification Authority console from the CA server.
2. Right-click the name of the certification authority and then select Properties.
3. In the CA certificates dialog box, choose the General tab, and then select the certificate.


4. Choose View Certificate
5. In the Certificate dialog box, choose the Certification Authority tab. Select the name of the root certification authority and then choose View Certificate
6. In the Certificate dialog box, choose the Details tab and then choose Copy to File.


7. The Certificate Export Wizard appears. Choose Next.
8. On the Export File Format page, select the DER encoded binary X.509(.CER) option
9. Choose Next
10. In the File to Export box, choose the path and name for the certificate, and then choose Next
11. Choose Finish. The .cer file will be created in the location that you specified in the previous step
12. A dialog box appears to inform you that the export was successful. Choose OK to finish

Import Certificate

1. Open Microsoft Management Console (MMC) and add the Certificates snap-in. Make sure that you select the Computer Account option and NOT the Service or User options.
2. Expand Trusted Root Certification Authorities, right-click Certificates, select All Tasks, and then select Import.
3. On the Welcome to the Certificate Import Wizard, choose Next.
4. On the File to Import page, choose Browse and locate the certification authority certificate that you recently exported, and then choose Next.
5. On the Certificate Store page, make sure that you select Place all certificates in the following store and that Trusted Root Certification Authorities is visible in the Certificate Store section. Choose Next.
6. Choose Finish to close the program.

Friday, April 2, 2010

Generating an SSL Certificate for Exchange 2007 from a Certificate Authority

When a new Exchange 2007 environment is set up, although the default Web site on the Exchange 2007 Client Access Server is automatically configured with a default, self-signed certificate, this certificate is not supported for Outlook Anywhere.
We get the following warning.


To solve this problem we will first install a "Certificate Authority" on our domain.
This can be done on 2008 Server by adding the "Active directory Certificate Services" role.

First We create a "certificate request" command by the wizard provided on "https://www.digicert.com/easy-csr/exchange2007.htm"


Copy your generated command and execute it Exchange Management Console (EMC).


A certificate request will be created on the file path specified in the command. (Note that in Exchange 2010, remove the path, and the cert request will be displayed on the screen. Copy it to notepad.) We can now submit the certificate request to the Microsoft certificate authority. One way to do this is to open a browser on your "DC" and type http://dc_name/certsrv. On the Welcome page, click Request a certificate.


On the Request a Certificate page, click Advanced Certificate Request

On the Advanced Certificate Request page, click Submit a certificate request by using a base-64-encoded CMC or PKCS #10 file, or submit a renewal request by using a base-64-encoded PKCS #7 file.

Open the generated certificate request file in "notepad" and copy the text.

Paste the content of the certificate request file into the "Base-64-encoded window as shown in the figure below. Then select Web Server in the certificate template drop-down menu and click Submit.


The certificate has now been issued and you can download a DER or Base 64 encoded version by clicking Download certificate or Download certificate chain. Let us select Base 64 encoded followed by clicking Download certificate chain.

It is time to import the issued certificate in Exchange 2007, using the Import-ExchangeCertificate cmdlet. We do this by typing the following command in Exchange 2007:

Import-ExchangeCertificate –Path c:\certnew.p7b

( For Exchange 2010: Import-ExchangeCertificate -FileData ([Byte[]]$(Get-Content -Path c:\certName.p7b -Encoding byte -ReadCount 0)) )

The certificate has now been imported to the personal certificate store.

To verify the certificate looks like expected, let’s now type the following command:

Get-ExchangeCertificate -Thumbprint thumbprint | FL

Finally we need to enable the certificate for the client services, our end-users will use to connect to their mailboxes. In this setup I will enable the certificate for OWA, EAS, Outlook Anywhere, POP3 and IMAP4. To do so we need to type:

Enable-ExchangeCertificate –Thumbprint thumbprint -Services “IIS, POP, IMAP”


Also import the certificate to personal certificates through certificates console.


Note: Help has been taken from "http://www.msexchange.org/articles_tutorials/exchange-server-2007/high-availability-recovery/load-balancing-exchange-2007-client-access-servers-windows-network-technology-part3.html"

Thursday, April 1, 2010

Move a Mailbox Database Path or Storage Group Path in Exchange 2007?

When a time comes where you want to move your mailbox database from one drive to another in a machine, you have two options:
To move the mailbox database or
To move the Storage Group.

Both these options are available in Exchange Management Console (EMC) --> Server Configuration --> Mailbox
Right click on any option, give the new path and click on the "Move" button.

If you move a mailbox database only, the .edb file is moved.
If you want to move the log and system files as well, then you should move the path of the Storage group.

Assigning Static IP Address to a DAG

Article on "How to Assign an a Static IP Address to a DAG available on :

http://www.howexchangeworks.com/2010/01/assigning-static-ip-address-for.html

How to Create DAG in Microsoft Exchange 2010

A good article written on this subject at

http://www.howexchangeworks.com/2009/07/configuring-database-availability-group.html